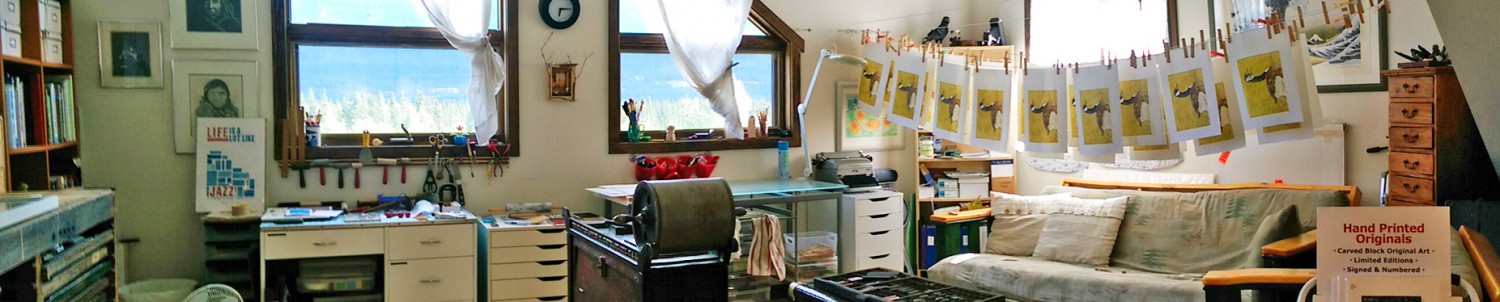
Recently I had the joyful task of teaching children in grades three and four about printmaking. I was part of a group of artists offering workshops in painting, creative movement, action arts, 3-D sculpture, video gaming, printmaking, collage and dance.
 My group of nine children were enthusiastic, and thought they knew nothing of printmaking. But, when I asked if they had ever used a stamp, or made a print of their hand or foot on paper (or a floor), they realized they were printmakers indeed!
We had three sessions together, and spent each class exploring a different form of printmaking. The first week, we made relief prints using styrofaom, the second week we printed monoprints (or glass prints, as I called them), and the third week we created beautiful collagraphs, or prints from “found objects”.
I was talking with another printmaker who has children, and she asked me to post up a “how to” so others could share the art form of printmaking with kids. Here is what I taught, and also what I learned from my great group of kids.
(Too see a workshop where I taught art teachers the same techniques, click here.)
A WORD ABOUT PAINT / INK
Before I explain each process, it’s important to know that when working with children, there is a great non-toxic substitute for printing ink: student-grade acrylic paints. My good friend and book artist, Dea Fischer, recommended a creamy paint she had used for teaching: Chromacryl which can be found in some art supply stores (depending on where you are, it may take a little looking). This paint is creamy to roll out, but thick enough to act like a printing ink, and creates rich and colorful results. I also added a little acrylic flow medium to thin the paint for rolling but also to slow the drying time for the hour we would create and print. You can also use regular craft acrylic paints.
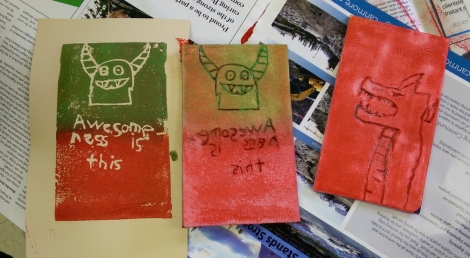
RELIEF PRINTING USING STYROFOAM
The organizing teachers were happy to know that I could teach relief printing without sharp tools. Using styrofoam as a “plate” works great, as the children only need pencils or pens to score their design into the styrofoam. The important note is that the design (and any lettering) needs to be scored into the plate backwards so that the print comes out “readable” and in the right direction.
I bought styrofoam picnic plates and cut them into circles, and also asked my local supermarket for a donation of unused flat meat trays, which they were happy to supply.
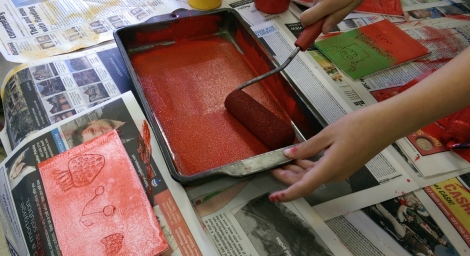 Using baking pans and foam paint rollers from the dollar store, we squeezed out different colored paints in each tray. With the styrofoam designs completed, we rolled a thin layer of ink onto the plates, then placed our paper (bond works, but I find that a heavier card stock works even better) on top of the plate and rubbed the back with our hands. Pulling back the paper revealed the magic of the print!
MONOPRINTING / GLASS PRINTING
For session two, we explored monoprinting. This is a form of printmaking where artwork is painted on a glass plate, and only one print can be made since the paper lifts most of the ink (paint) off the plate. The same Chromacryl paints were used. This method allows a little more creative freedom, as the students could use many colors and a paint brush or their fingers to create a design.
Students still needed to remember to do the design backwards, but they caught on quickly once they had learned that process with relief printing. The biggest challenge with this method was that you need to work quickly and print right away, as the paint will start to dry, and dry paint leaves no impression.
The monoprint plates were made using glass from a cheap frame, placed on a board and duct taped to the board. The duct tape protects the board so we can wash the design off after printing and reuse the plate, but don’t let the ‘plate’ soak in water. You can also use baby wipes to get the paint designs off.

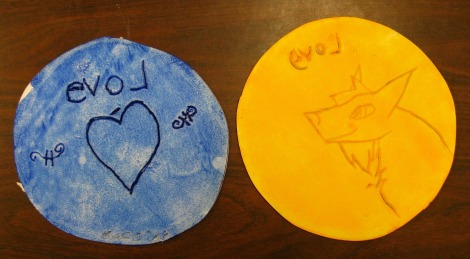
Above: peeling back the paper to reveal glass print.

Above: the glass design and the pulled print.
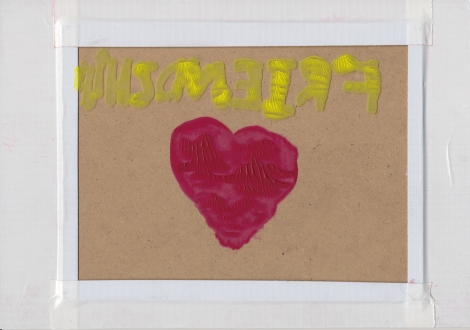
COLLAGRAPH / FOUND OBJECTS PRINTING
The third class, we explored printmaking with objects by building up the plate (rather than taking away as in relief printing) through the addition of cardboard, foam stickers, paper clips, pipe cleaners and more.

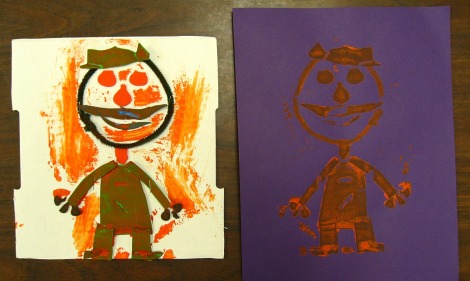
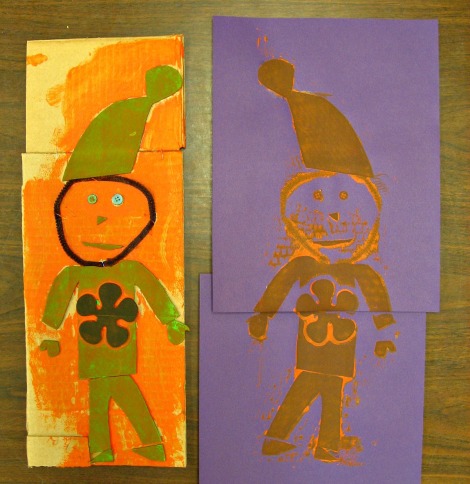
The flat board has craft foam for body and mouth, pipe cleaner for head and nose, tacks for eyes. This is the inked “plate”.
The only trick to this is to use materials that are roughly the same thickness, so that your finished “plate” is somewhat uniform in height. Although some inconsistencies can be accommodated, the finished prints are most successful when items glued or stuck to the plate are not vastly different in thickness/height.
If you have a longer drying time, non-toxic glue is great for attaching the pieces to the board. Otherwise, if short on time, you can use staples or two-sided tape to attach the pieces (the staples may show in the final print, but that can be a decorative element!).
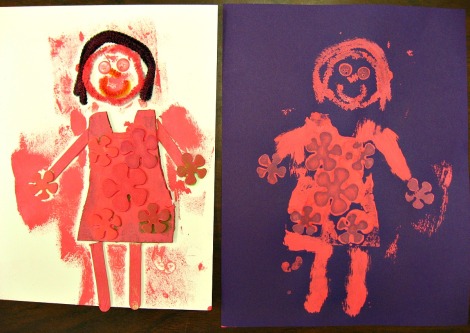
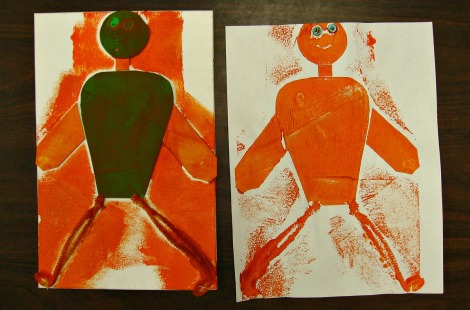
Start with a substrate (a thick, flat surface) like a piece of cardboard or mat board. The students created self portraits to give them a creative parameter.
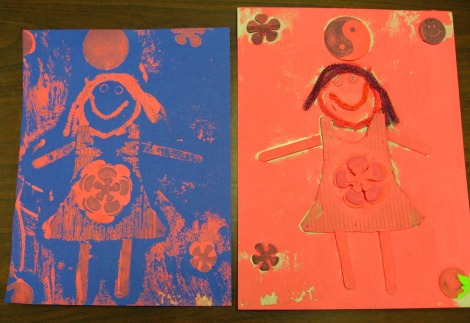
They began by cutting their bodies from pieces of cardboard and squares of craft foam, and even added foam flowers I purchased at a craft store (these come with sticky backs). For the faces, some made the shape from a pipe cleaner, then added paper clips for ears, and buttons for eyes.
Once complete, the printing method is a little different. We created a model like a printing press by using two flat boards (MDF or even the hard backs from picture frames work great), squares of fleece for the “blankets”, the collograph base art + paper. The students’ feet became the press!
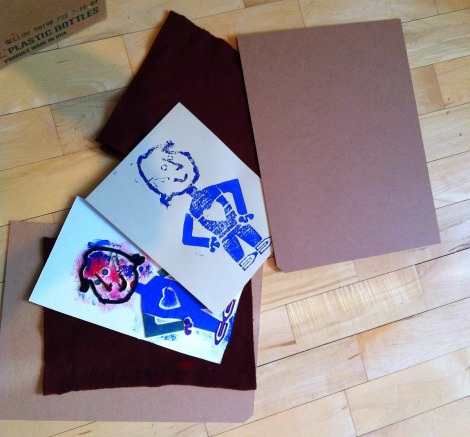
Set up the “press” on the floor (you can use newspaper to protect the floor) by laying down the one of the boards then a square of fleece.
Using the same foam rollers as for the relief printing, spread the ink on the raised art (don’t worry if some of the ink gets on the substrate).
Place the inked artwork (ink side up) on board/fleece on the floor, then top the art with a piece of card stock you want to print on (bond is not stiff enough for this). On top of that, add the second square of fleece, and top it off with the second board.
Really, you’ve created a board “sandwich” with the artwork and paper touching and protected by the layers of fleece! Students stand on the “board sandwich” to create pressure, which imitates a press.
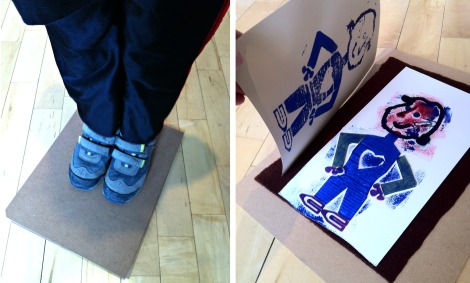
The students then stand right on the board, and gently move their feet around the board to ensure all pieces of the art were “impressed”. (Make sure they don’t jump or wiggle, or the artwork may smear.)
Once the student gets off, the top board, fleece and card stock is peeled away carefully to reveal the print. And, like magic, a collagraph print is made!
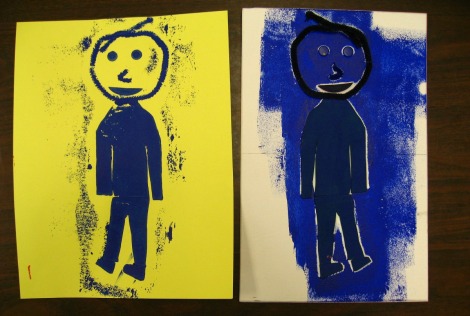
The last part of this blog is a gallery of student collograph self portraits. This may have been my favorite class, as the “plates” turned out as beautiful as the prints!
Working with children can be so fun and satisfying. They love learning something new and they are willing to try anything. And that, in a nutshell, is the lesson I came to learn from them.

Thanks for sharing your experience Linda. I absolutely want to try these techniques the next time I visit with my niece and nephews.
You’re welcome, Drew. The kids really love it, and really it is quite simple! (You could even use your own rollers since you have them!)
Hi Linda,
I nominated you for a blog award. If you’re interested you can find more info here:
http://drewkail.wordpress.com/2012/04/08/ive-been-nominated-for-a-blog-award/
Drew
Thanks so much Drew! I love your blog as well! drewkail.wordpress.com
This is fabulous, Linda! I’d like to try some of these techniques with my class. The students you had could help instruct. I have some photos of you with the students that I’ll pass onto you asap. Sue Bjorge
That would be great, Sue! I love the idea of having the students pass along their knowledge! Let me know if you need anything.
This blog post is very impressive! Your passion for print making is contagious, and what an amazing experience for our students! I could not get over the volume of work that came out of your session with Grade 3 and 4 students! Thank you for your hard work! Jody Keon
Thanks, Jody! What fun it was to have the opportunity to work with the students. They were so engaged and enthusiastic. Your school is doing a fabulous job of helping them explore through the arts and express themselves. Hats off to you teachers, as well!
Pingback: “a” is for Art Today – ‘Back Path’ « Inspiration Import·
Pingback: 10 things I’ve learned about art shows | Musings From The Studio·
Thank you so much for this great post! I am working on some lesson plans for my Online Preschool and the theme is Art Around the World. I’m so glad I found this link to put in my lesson plans. Thank you!
You are so welcome! I’m delighted that this is helpful. The kids I taught LOVED printmaking, it’s quirky, fun and not a really common art form taught in school. Thanks for spreading the love! (And reading my blog, too!)
Oh my goodness you are so awesome to respond to me so quickly! Thank you. Here is the link http://online-preschool.cullensabcs.com/themes/ to where I will post it tomorrow so you can take a look if you’d like. Thank you again! 🙂
Haha! Yes, the wonders of technology! I was on computer when I saw your message! 🙂 Thanks for the link. I will definitely check it out!
Pingback: Art in action at Canmore Museum | Musings From The Studio·
Thank you! We are about to use the book ‘Fox and Fine Feathers’ with my year two class. The book illustrations are done with lino block prints but as Im too scared to use the tools, I was looking for an alternative! I’m going to pop in to our local supermarket tomorrow to ask for some meat trays!
Hi Venny! I am so glad you were able to use this information for your class! Happy to help. Good luck with the supermarket … They are usually happy to “donate” the trays. Have fun!
Pingback: Teachers’ workshop a playground of art | Musings From The Studio·
Pingback: Ideas on how to foster creativity by artist Linda Cote. - ritewhileucan·